Setting up Raspberry Pi 4 Baby Monitor
So I decided to go down the route of creating my own "baby monitor". Granted I could of bought some cheap amazon monitor and it would of worked find, but where is the fun n that? If you want to make a baby monitor that will be useful for other things in the future such as an indoor home security camera, or maybe just something to play with, I will try and show my path of doing it.
Hardware
Raspberry Pi 4 4GB model with case or Raspberry Pi 4 4GB model NO case
SD Card 128 GB or SD Card 32 GB
Price
The price can vary, but here is a breakdown.
| Part | High | Low |
|---|---|---|
| Raspberry Pi 4 4GB | 78.99 | 62.00 |
| Night Vision Camera | 18.99 | 18.99 |
| Microphone | 7.99 | 7.99 |
| Flexiable Arm | 12.50 | 12.50 |
| SD Card | 19.49 | 7.99 |
| Totals | 137.96 | 109.00 |
Overall I think either way it is a decent price for a secure, open, and private baby monitor that you can use later on down the road for whatever you want.
Software
In this section you can choose many different operating systems, but usually I have found going with the most popular usually makes it easier to do things because you do not have to figure everything out yourself. You can build off the work of others and it is offically supported so you can go and complain to the company that created it. ::grinning_face::
So with that said I decided to just install NOOBs and then let the wounderful prompt direct me through the process of installation. Forunately, or unfortunately depending on your perspective this process is easy, or hard if you do not like the command line.
OS Install
Basically I will mix and match to my preferences. I decided to use disks to format my SD card. It is visual and easy. I like visual when messing with my disks because I do not want to accidentially erase something else especially when formatting. I recommend you do the same, or triple check if you want to use the command like to format the SD card. Disks is very easy to format. Select the SD card. Click the little gear icon under the graph of partitions to the right and click "Format Partition".
At this point you are ready to basically unzip NOOBs to the SD card. So in a terminal cd to the correct SD card mount point. If in Gnome just unplug the SD card and plug it back in if it didn't show up and you should see it on the left in nautilus("Files"). Once you have clicked on it hit Ctrl+L and copy the path from the mount point. Now that is where you will cd to. I will share what mine looks like.
cd /media/$USER/87CC-7DF9
Yours will and should be different unless you have the same username and SD card which would be strange.
Now unzip NOOBs. My command looks like this.
unzip /home/$USER/Downloads/NOOBS_v3_2_1.zip
If you just want to install the raspbian image you can use a program like Etcher to copy the image file to the disk. You can format with "Gnome Disks", or use "KDE Partition Manager" and then use Etcher the same. Now if you are on Mac, or Windows then I will leave that up to you to figure out. Here is their website - https://www.balena.io/etcher/
After that you will want to enable SSH and the Camera module. Luckly in the newer versions of raspbian it is easy. Go into Preferences in the menu then select Raspberry Pi configuration. Go through any settings you want and enable SSH and Camera.
After that you can work from your real desktop and disable the Pi desktop if you like. That is how I will be doing things.
Important Projects
PiCam
These projects are what I think reall make doing a project like this a dream. So simple thanks to the work of Nao Iizuka. His github page is here - https://github.com/iizukanao/picam The project is called PiCam. It is written in C so very efficent and the way it is put together makes it easy to plug into with whatever language you want.
hls.js
As you can see from this short bit of JS it is extremely simple to get going.
<script src="https://cdn.jsdelivr.net/npm/hls.js@latest"></script>
<video id="video"></video>

<script>
    var video = document.getElementById('video');
    if(Hls.isSupported()) {
      var hls = new Hls();
      hls.loadSource('/hls/index.m3u8');
      hls.attachMedia(video);
      hls.on(Hls.Events.MANIFEST_PARSED,function() {
        video.play();
      });
    }

    else if (video.canPlayType('application/vnd.apple.mpegurl')) {
      video.src = '/hls/index.m3u8';
      video.addEventListener('loadedmetadata',function() {
        video.play();
      });
    }
</script>
Conclusion
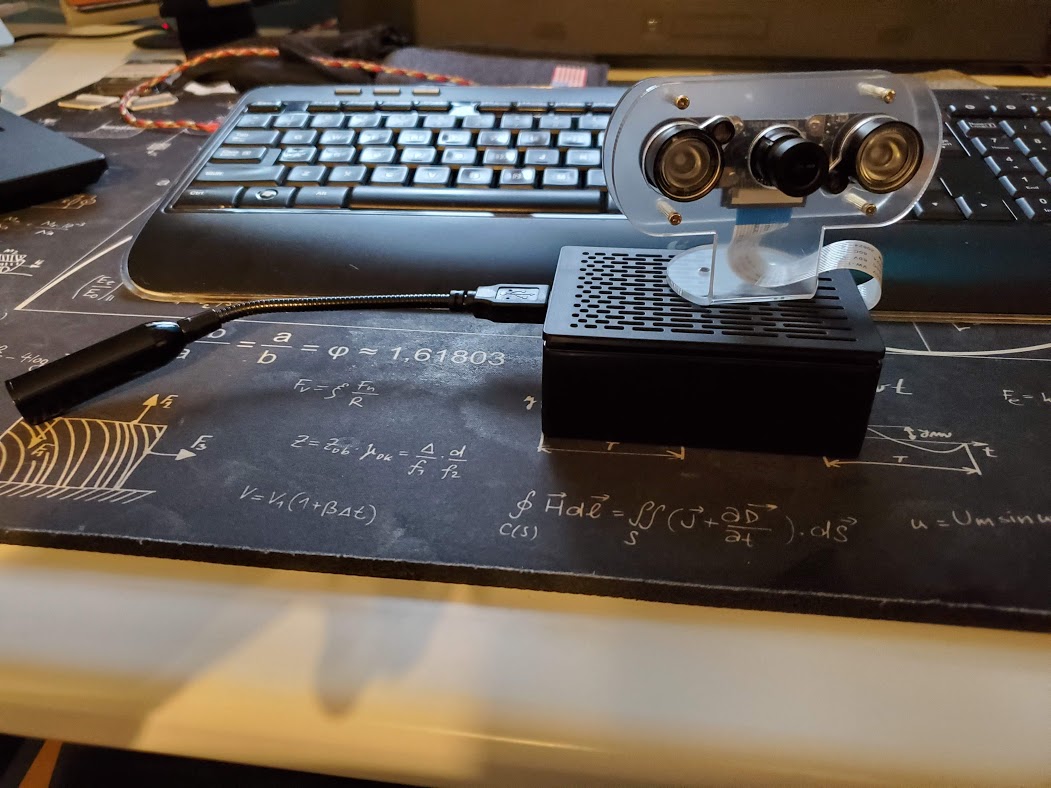
Here is what the device looks like put together.

As for mounting the night vision camera, I originally used hot-glue, but I found my wife ended up just hitting it on occasion which eventually disloged the camera. I am now thinking it is best to use some screws with nuts on the other end of the case, but depending on how you mount yours hot glue may do the trick. I will leave that up to you.
Any way, I hope you enjoyed the project as much as I did. Makes me want to tinker with some more stuff.